Spring cleaning the cupboards

Are you planning to ‘spring clean’ your kitchen cupboards? Now is a good time to do so, with many of us having extra time on our hands since we’re staying home because of the corona virus. So yes, get in there and empty EVERYTHING out so you can scrub all the surfaces in your cupboards and maybe even replace tired shelf liners. And dispose of all those foodstuffs that have been forgotten about for ages–WAIT a minute!

Just because something has been in the cupboard for a long time doesn’t mean it is no longer good. Think carefully about each item before you decide its fate. Examine the packaging first. If the outer packaging is damaged, set it aside to deal with when you’ve finished cleaning (see end of post). If it’s not damaged, read the label. Maybe it has a date on the package, but what does the date mean?IMG_4015[1]

We live in an era that is driven by profit on the one hand and terror of lawsuits on the other. Sellers want to maximize their takings (more on this later), and nobody wants to get sick from their food, or make anyone else sick. Date marking food products is partly a result of these factors. Consumers can be fooled into thinking if a date on a package is past, the food inside is unsafe, but that isn’t always the case. Does the date refer to the retailer’s sell-by date? Or a ‘use by’ date? Or when the food was produced/packaged? Or is it a ‘best before’ date? What’s the difference? Use the information to help you make decisions, but don’t let every stamped date make decisions for you.

Some of the dates on packaging are there simply as identifiers (production or packaging dates). These are important for producers and retailers, to know which items to sell first, and they can be useful to consumers for deciding which item to use first, but are the least important  to worry about in terms of nutritional value and food safety. If you see a date on your package that has an indecipherable code with it, that is probably a production/packaging date. Use your oldest things first.

Food that doesn’t store very well (generally perishable, raw foods) may have a retailer’s sell-by date or a consumer’s use-by date. These foods usually require refrigeration, so shouldn’t be hiding in the back of your cupboard. Be sure to follow storage instructions on any foods like this! Look for sell-by dates before purchase. After that, look for other date stamps. If you have a date label that clearly says ‘use-by‘, that means the item may begin to perish by then, certainly if it hasn’t been kept in ideal conditions. These will usually be on prepared foods, like deli salads.  The idea is that this food item might not be safe to eat after this date. But it might still be ok, particularly if it hasn’t been unsealed. Use your common sense, as well as your five physical senses, and if you have any doubt at all, throw it out. (Compost the contents if you can.)

In contrast to use-by dates, ‘best before’ dates indicate a more subtle situation. Nearly all food is ‘best’ when it is absolutely fresh, and after a certain amount of time, it will begin to lose ‘freshness’, and that is what the date indicates. Over time, food may lose colour and flavour; texture can change in storage (think of stale cereal, or foods with freezer burn). Perishable foods especially break down internally and lose some of their nutritional value. But if not actually spoiled, they can still be safely eaten. Sometimes, a ‘best before’ date is entirely arbitrary, deliberately chosen to encourage consumers to replace items more frequently than they might otherwise.

Different countries have different rules about labelling, and there has been a move away from ‘use-by’ dates in favour of ‘best before’ when food safety is not the prime  issue, to reduce confusion, as shown with this cheese.

IMG_4011[1]

‘Best before’ dates are sometimes clearly spelled out, as above. Other times, abbreviations are used, such as ‘BB’ or ‘BBE’ (Best before end) followed by a month and year. These fit better on small packages such as tins of soup.

IMG_4012[1]

If you find some of your cupboard food is past its ‘best before’ date, you don’t have to automatically throw it out. If it doesn’t look damaged, give it a chance. Tinned foods can be treated as new, provided the container isn’t damaged. Cereals and crisps, if they’ve gone stale, can be refreshed in the oven, or used in recipes. Pasta and rice might only need a longer cooking time than when fresh. Herbs and spices don’t generally spoil, but they can lose their flavour when exposed to air and light. So before you throw away a jar, open it. If it hasn’t lost its smell, it is probably still perfectly good. If it’s a little less potent than you expect, you can probably just use a larger spoonful than before (but don’t forget why when you do replace it!). I buy my herbs and spices in catering or refill sizes, only part-filling jars on display if they don’t get used quickly, and keeping the balance in airtight containers in the dark.

If packaging is damaged, whether a date is past or not, decide whether the contents are spoiled or contaminated. Dented tins should be treated with caution–any bad smell or ‘fizz’ when opened means danger! If the contents don’t look ‘right’ when opened, get rid of it. Jars that have ‘lost their seal’ may have similar spoilage symptoms. Check for pests or their debris in damaged paper/cardboard/plastic packaged foods. Dispose of anything you’re not confident about (again, composting where possible). But if there’s no spoilage or contamination, repack the food in airtight containers and/or plan to use these foods right away.

Tagged with: , , , , , , ,
Posted in Kitchen Economy

Frying pan Sweet Corn Souffle

photo of plated up sweet corn souffle

Hmmm, I need lunch. What’ve I got that needs using? A hunk of two-day old bread and a cup of leftover sweet corn.  I bet I could make a quick Lenten lunch from that and a few odds and ends….

After eating the not so pretty (but still yummy) results of my impromptu souffle, I’ve worked up a recipe that does turn out pretty and could easily be doubled and still done on the stove top. More than that and you might as well go the whole hog and do a proper baked souffle in the oven.

Makes enough for a one-dish meal for one very hungry person or mains for two people, or sides for 3 or more.

Ingredients:

2-3 slices’ worth Stale bread, chopped up roughly. Crumbled bread will give a smoother souffle. I made mine chunky.
1 cup Sweet corn off the cob; frozen or canned is fine. May use creamed corn, which will give a smoother souffle
1/2 cup Shredded cheese–anything that melts well, and colour is good.  I recommend Red Leicester (UK) or medium-sharp cheddar (USA). Use more for binding if you’re short on eggs.
Some Onion and/or garlic (to taste); chopped fine.
Shy 1/4 cup Vegetable oil. (You could use milk, but the texture will be different, and the souffle might burn/stick to the pan.)
1 large or 2 small Egg(s). More eggs will provide more binding, but too many eggs will give a result that is closer to omelette than souffle.
1 Tablespoon Plain yogurt (increases puff)
Some Savoury herbs and spices as desired. I used rosemary.
Generous tablespoon Butter or oil for greasing

Directions:

  1. Mix bread, corn, onion/garlic and cheese in a medium bowl.
  2. Stir in oil. If the bread is very dry, allow this mixture to stand for a few minutes.
  3. In a separate bowl, beat eggs with yogurt and seasonings. Beat well if you want any puffing souffle effect!
  4. Gently fold egg mixture into corn/bread mixture.photo of mixed ingredients
  5. Prepare the smallest frying pan that your mixture will fit into: Melt/heat butter over fairly high heat (not so high that it smokes).
  6. Spoon mixture into hot buttery pan. Cover as well as you can.
  7. Reduce heat to medium high. Cook for 5-10 minutes. Check after 5 minutes to see how well the centre of your souffle is doing. You may need to reduce the heat further to prevent scorching.

    photo of half-cooked souffle

    It’s cooking, but still looks pretty liquid in the middle.

  8. Particularly if your souffle doesn’t seem to want to cook in the middle, but is at risk of burning on the bottom, pre-heat grill/broiler. Place your whole uncovered pan carefully under the grill for a pretty finish.

    photo of frying pan under grill

    My pan handle isn’t fire-proof, so it stays outside the grill space.

  9. Slide souffle out of pan onto a heated plate to serve.photo of fully cooked souffle
Tagged with: , , , , , , ,
Posted in Kitchen Economy, Leftovers, Recipes

Wild Garlic Soup

A seasonal treat that’s quick to prepare and easy on the budget!garnished with yogurt etc 12-04-2018 06-04-50 PM

We live in a place where wild garlic dominates the hillsides in late winter and early spring. I love the smell of it—delicate at first, and stronger as the flowers begin to emerge, until it can become quite overpowering later in the season. Mid-season is a good time to forage for wild garlic leaves: there’s plenty about, yet they haven’t yet begun to go leathery, and there’s few flower stalks in the way.

Quantities given are per person for a main dish; it will serve more as starters.

Ingredients:

A double handful Wild garlic (ransom) leaves
1 small Leek
1 tablespoon Vegetable oil
1 medium or 2 small Potatoes
1 cup (1/2 pint) Vegetable stock
Bunch Fresh parsley (optional)
1 tablespoon Plain yogurt (optional)
Dash Nutmeg

Directions:

  1. Rinse and pick over ransom leaves. Discard any that are damaged, or old and leathery. Chop roughly.
  2. Clean and chop leek(s).
  3. Heat oil in a saucepan; add chopped leaves and stir around. Cover and leave to sweat over low heat while you prepare the potatoes.
  4. Wash potatoes and slice thinly. Cut large slices in half crosswise.
  5. Stir potatoes in to leaves. Add stock–it should cover all the veg.
  6. Increase heat to bring to a boil.
  7. While the stock is heating up, chop a handful of parsley if you’re using it. Add to the pan, then reduce heat and simmer for about 15 minutes, or until the potatoes are cooked fully.
  8. Whizz the soup to a thick velvety texture, with or without any remaining chunks of veg. whizzed up ransom soup 12-04-2018 05-57-49 PM
  9. Return to heat for 5 minutes or more, to bring it back up to serving temperature.
  10. Serve in warmed bowls. Garnish with yogurt, nutmeg and parsley sprigs.

    vegan version 12-04-2018 06-04-53 PM

    Vegan version with no yogurt


Tagged with: , , , , , , ,
Posted in Eating seasonally, Recipes, Spring

Leek and Potato Boats

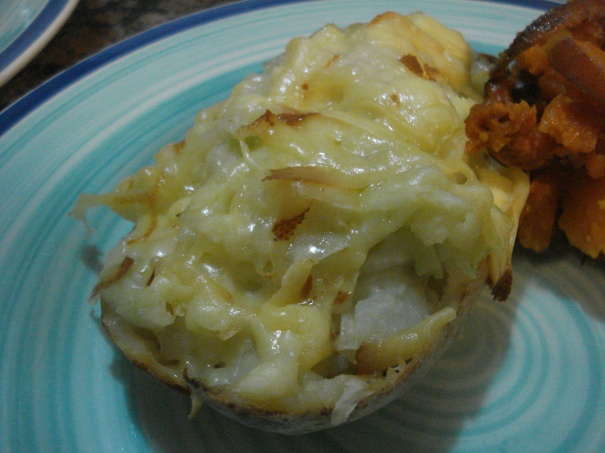
It’s St David’s Day again–time to celebrate all things Welsh, and time for a new recipe using leeks! This one can use virtually all leftover bits and bobs, or can be made fresh. Just add the necessary time to bake potatoes. Caerphilly cheese is also a Welsh speciality, so if you can get it in your area, do give it a try.Picture of baked leek and potato boat on a plate

Serves three

Ingredients:

1 1/2 Cold leftover jacket (baked) potatoes
1-2 tablespoons Butter
1 cup Steamed chopped leeks
Dash Ginger powder
About an ounce Shredded smoked Caerphilly (or other Gouda type) cheese

Directions:

  1. Preheat oven to 350F/180C/gas mark 4.
  2. Cut cold potatoes in half lengthways. Scoop out most of the potato, leaving only enough to help the skins hold a potato shape (your ‘boats’).
  3. Mash the potato insides and heat gently with butter.
  4. Stir in hot leeks and ginger.
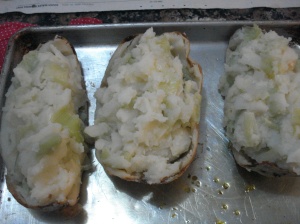
  5. Divide the mixture between the three potato ‘boats’ and stuff gently.
  6. Top with shredded cheese.
  7. Bake until heated through and lightly browned, about 20 minutes.

Enjoy!

Tagged with: , , , ,
Posted in Holidays, Leftovers, Recipes

Planned Leftovers with Ox Heart

Ox heart is not something you see every day in the average (super)market, but when you do, it is definitely worth snapping up. As a member of the offal family, it comes dirt cheap, but it can be prepared in a number of different ways, which variously emphasize its affinity to other organs or to steak. Plus, there’s enough meat on it to serve at least 8 people.

Choices of how to cook ox heart include boiling then pickling (my grandmother’s favourite), slow stewing (my first instinct), roasting, and more. Because I wanted to have the maximum opportunity for leftovers variety, I opted for roasting, and used a modified version of the recipe I found here.

My daughter came for a visit between Christmas and New Year, so it was a good opportunity to play with what for us is rather non-traditional food. To me, the meat tasted mostly like beef steak, though my family detected a faint hint of organ, too. Either way, it is definitely a rich meat, so portions need to be on the smaller side than normal.sliced-ox-heart-24-12-2016-06-21-55-pm

Day one: Stuffed roasted ox heart with cherry port sauce (a pre-packaged gift), baked pumpkin and wilted cabbage salad.

Day two: Hot meat sandwiches with thin-sliced heart and bubble and squeak (made with pumpkin instead of potatoes).

Day three: Basic leftovers of cut up chunky strips, browned all over and covered with hot leftover port sauce (see above), leek and potato boats, cranberry salad.

Alternative leftover meals:

Stuffed cabbage–using ground leftover heart for the meat element.

Soup (of course).

Tagged with: , , , ,
Posted in Kitchen Economy, Leftovers

Sharing Sunday dinner

We’ve got a friend who lives on his own and has recently had surgery on his hand. How could we not invite him over for Sunday dinner, even if it means my other half will have to drive out to fetch him? The food will have to be easy to eat one-handed, so fork tender. As he’s got traditional tastes, I’m fixing Oven Pot Roast. Since it’s rather earlier in the season than when I posted that recipe, today’s version doesn’t have celeriac or leeks, but I’m adding chopped up patty pan squash and a bit of celery for extra flavour. And there will be seasonal fruit crisp fresh out of the oven for dessert.

Can’t wait!

Picture of meat and veg in open casserole

Here’s one I made earlier….

Tagged with: , ,
Posted in Autumn, Uncategorized

Cold weather food

It’s the coldest day of the season so far, and there’s a cold north wind to boot. So I’ve got a pot of soup on the stove for tonight’s supper: stock from pheasant bones and warm spices, various veggies from the store cupboard, and apples (to balance the hotter spice with some sweet, and to thicken the broth).
While that cooks, I’ll continue to harvest tiny sweet orange tomatoes from the greenhouse, and sort through a box of the grapes I picked the other day. Maybe I’ll make more juice to freeze, or maybe jam. So many choices!
dsc04528

Grapes in the greenhouse a few weeks ago

Tagged with: , , ,
Posted in Autumn, Kitchen Economy

Stuffed Butternut Squash

So called ‘winter squash’ is one of my favourite fall and winter foods. (It is actually harvested in autumn.) The main characteristic that distinguishes it from ‘summer squash’ is the density of the flesh. Summer squashes are light and watery, storing briefly at room temperature or in refrigerated conditions. A summer squash past its best discolours and quickly goes squishy. Winter squashes are heavy and dense, and are suitable for long storage in cool pantries or cellars. When finally past their best, the skin will wrinkle and the fruit will begin to collapse in on itself, but will still be usable for a while. The taste of winter squash is similarly more robust than that of  summer squash. There are many varieties available, but the one most easily found here in Wales at this time of year is butternut squash.
Stuffing vegetables, especially squash, is incredibly easy and versatile, with the added benefit that you can shorten cooking time by kick-starting it in the microwave, and/or leave it in the oven to keep warm for a fairly long time. For this recipe, I used some of our own small, home-grown butternut squash, in prime condition.Picture of stuffed squash dinner

Serves 2

Ingredients:

One, one pound Butternut squash (you could use a small acorn squash)
1 cup Leftover beef stew (not runny)

Directions:

  1. Preheat oven to 350F/180C/gas mark 4.
  2. Cut squash in half lengthwise and scoop out the seeeds.
  3. Microwave on high power, cut side down, for 3-5 minutes. The squash should be hot to the touch, but the solid end should not be cooked through.
  4. Divide stew between the two squash halves. Place in baking dish and cover loosely.

    Picture of stuffed squash in baking dish

    Squash stuffed and ready to cover before going in the oven. Notice that the hollowed/stuffed end has begun to take on a shine as it cooks, but the solid end has not.

  5. Bake for 30 to 60 minutes, until squash is tender and beef is hot through. You can put the dish in the oven before the oven is fully pre-heated, and you can keep it warm in the oven if dinner is delayed. The meat will eventually dry out, so keep it covered to minimize loss of moisture.
  6. Serve with a green vegetable and complement the dish with a chutney or pickle based on a tart fruit, such as cranberry or rhubarb.Picture of squash plated up
Tagged with: , , , , ,
Posted in Autumn, Eating seasonally, Leftovers, Recipes

Pasta Disaster?

How embarrassing! Within minutes of posting my last recipe, I realized that I had not, in fact, prepared fettuccine, but tagliatelle.  I guess I was just too caught up in the alliteration of my recipe name to notice what I was actually cooking! You could, of course, prepare it with actual fettuccine, but the textures won’t be quite as compatible.

Can anybody think of a better clever name for ‘Tagliatelle with fennel and feta’?

Posted in Uncategorized

Fun with Fettuccine, Fennel and Feta

The last time I was in the greengrocer’s, they were selling off some bulb fennel at reduced prices, so I bought a bag. Bulb fennel is quite strongly flavoured, and a little goes a long way, so I figured we’d get at least two meals out of it for only about a pound. The first one I sliced up and added to a harvest medley to roast. Oh my goodness! Within minutes, the kitchen smelled so aniseed-y that I thought I was going to be sick. I turned on the extractor fan and hoped for the best. Fortunately, by the time everything was cooked, it had all settled down a bit, and actually tasted pretty nice. (Phew!) So last night, I decided to play it safer, and braise the fennel to add to our dinner. But I also wanted to use up a few scrappy leftovers and play with flavour combinations. This is what I came up with.Picture of bowl of fettucini, fennel and feta


Serves 2

Ingredients:

1 Fennel bulb
1 teaspoon Mango chutney (or other very sweet chutney/jam)
1 Vegetable stock cube
4-6 nests Fettuccine (I use half whole wheat)
A few Large stuffed olives–leftovers are good!
1 tablespoon Olive oil
2-3 ounces Feta cheese
Sprinkling Herbs, such as oregano (optional)

Directions:

  1. Wash the fennel bulb, slice in half lengthwise and trim off any icky bits.
  2. Slice each half into vertical slices about 1/8 to 1/4 inch thick. Further slice the ends if they are too chunky. Slice down the middle of each slice. You are aiming for shapely pieces of a relatively uniform size, with nothing too thick which would cook slower.
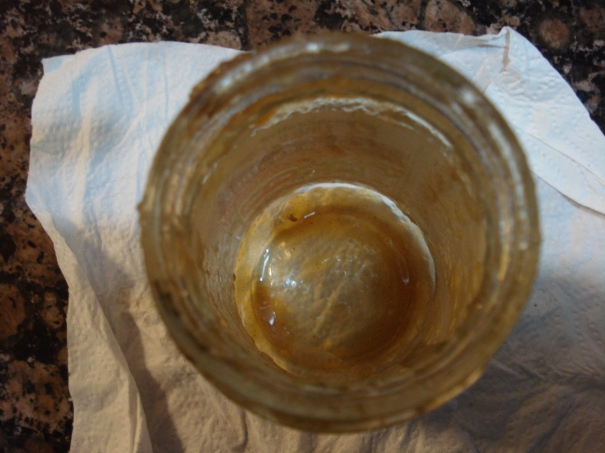
  3. Mix chutney with 1/4 cup hot water. You can use the hard-to-get scrapings from an otherwise empty jar for this. Simply pour water into the jar, screw the lid on and shake vigorously. Wear a hot mitt if necessary.
  4. Add vegetable stock cube to chutney water and stir to dissolve. The small quantity of water mixed with the stock cube will eventually result in a thicker ‘sauce’ instead of the broth you’d get if you used the usual amount of water per cube. Place fennel and flavoured water in microwavable casserole dish with lid. Stir around a bit.
  5. Cook in microwave on high, stirring every few minutes until fully cooked. This may take 6-10 minutes, depending on microwave power, thickness of vegetable slices, and how much water you actually used (less=faster). When it’s done, you will have ‘braised fennel’. I aimed for al dente, neither squishy nor crunchy, but still holding its shape.Picture of braised fennel
  6. While fennel is cooking, prepare fettuccine according to package directions. This time around, I used only 4 nests of pasta, as we wanted to have a relatively light meal.
  7. While fennel and pasta are cooking, slice olives in quarters lengthwise.
  8. Drain pasta and return to pan.
  9. Stir in olives and olive oil. If there’s enough with the olives, you won’t need to add any extra; use a rubber scraper to get it all.
  10. Fold in fennel, again using your rubber scraper to get all the sauce from the casserole dish.
  11. Portion into dishes, crumble feta over. Garnish with herbs if desired.Overhead picture of dish of fettuccine, fennel and feta

Serve this with a side salad for a delicious light meal.

Tagged with: , , , , ,
Posted in Kitchen Economy, Recipes
What’s Creative Economy in the Kitchen about?
Sharing a lifetime of experience of kitchen challenges. Respecting food and making the most of what's available. Read more on my About page.
Search the site by category

Enter your email address to follow this blog and receive notifications of new posts by email.

March 2015
Image of versatile blogger award
Blogging U.
Copyright

© Julia Davis-Coombs and Creative Economy in the Kitchen, 2014-2020. Unauthorized use and/or duplication of this material without express and written permission from this blog’s author and/or owner is strictly prohibited. Excerpts and links may be used, provided that full and clear credit is given to Julia Davis-Coombs and Creative Economy in the Kitchen with appropriate and specific direction to the original content.

Honey Homestead

My quest to grow 3 beehives into financial independence & the homestead that followed

Frustrated Nomad

always dreaming, sometimes doing...

organised castle

A simple, sustainable life